Showing posts with label Crystals. Show all posts

Tuesday, 14 May 2013

Julie's Delightful Daisies

I've had these for a while but haven't used them until now to make this card:


The daisies are pre-printed onto a 6 by 6 square of white card which I attached to front of a 6 by 6 card blank after I had embellished them.  I used Pro-Markers to colour some of the flowers and circles, added Candi and crystals to some and Retro Daisies to the large three.

The spine of this card is at the top and I scored horizontally across the back of the card before sticking the top half of the front and back together.  I'm not sure that makes sense but the image below should illustrate what I am trying to say:


This means the card stands at an angle like a frame.  I added a birthday sentiment inside the card.

Sunday, 12 May 2013

Celebrate In Style

Here's a card I made with the Bubble Bloom (Clarissa) stamps which I bought from Craftwork Cards:


I stamped both images using Black Soot Distress Ink and added Candi, pearls and crystals to fill the circles.  The leaves are paper pieced and I finished the card off by tying some black grosgrain ribbon round the spine.

There is another set of these called Felicity and they too are lovely.  Here is a link to both sets.

Saturday, 28 April 2012

For Julie


Today I've been to Embsay Mill near Skipton to see Julie Hickey who was hosting a Candi party.  I took her this card from the cats!

The bunting was cut from embossed squares and has small punched daisies between each piece  I added lilac crystals to each daisy and used some small letter stickers to spell 'Julie'. 

At the bottom of the card I added a strip of paper, a die cut daisy, a punched scalloped circle and an In Circle message.

Friday, 16 March 2012

Diamond Wedding


Here is a Diamond Wedding card which I made this week.  The chipboard numbers were embossed using a Cuttlebug numbers embossing folder and then painted with silver acrylic paint.  I attached the zero to the card using double sided tape and the six using foam pads.

At the bottom of the card I added a Message Band with a sentiment in the centre and some crystals to the side.

Friday, 21 October 2011

Frosty Blue Bauble


I cut the bauble using the largest of the Heirloom Ornament dies and added crystals and blue Candi to it.  The bauble is attached to the card using foam pads to give dimension.

Wednesday, 10 August 2011

Happy Birthday Sue


A little birdie told me that Sue Taylor from Craftwork Cards has a special birthday today!  This card is very similar to the one I made for Julie a couple of weeks ago for her special birthday but this is a completely different colour scheme.

Happy Birthday Sue, hope you have a lovely day xx

Monday, 8 August 2011

Merry & Bright


For this card I used rub ons to spell 'Merry' on the bunting and attached it to the card with Candi along the top edges.  I then spelt out '& bright' using lime green rub ons and attached three self-adhesive crystals to finish off the card.

Wednesday, 27 July 2011

Happy Birthday Julie


Today Julie Hickey celebrates a special birthday and here is the card I have made for her.  I hope she likes it - I'm sure she will as she likes purple, daisies and crystals, and the Candi I have used is called Julie!

Happy Birthday Julie, hope you have a fabulous day xxx

Saturday, 23 July 2011

Christmas Decoration


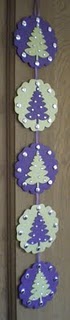
I made this Christmas decoration for the Craftwork Cards and Spellbinders cross promotional partnership.  The photos I took weren't too good so I've pinched these from the Craftwork Cards blog - thanks Julie!  It's really sparkly as the Candi is mirri silver and there's 80 crystals in total!

The designs are the same on the reverse side of the panels so this could hang in a window.  I actually had to remake the bottom panel as I dropped the decoration in the cats' water dish!  Fortunately it was only the bottom panel that was affected!!

Saturday, 30 April 2011

Très Chic - Crystal Chandeliers


Another simple card - I covered a square Back to Basics blank with Très Chic paper, tied grosgrain ribbon round the spine and added self-adhesive crystals to the chandelier.

Monday, 28 March 2011

Trѐs Chic On The Edge (Top Notch)


Another very simple card using a small On the Edge blank.  The die cut tag is attached with foam pads to add dimension and I used crystals in the centre of the punched flowers to add sparkle.

This actually looks better in real life - the scan hasn't picked up the pink of the tag too well.

Sunday, 27 March 2011

Trѐs Chic On the Edge (Scallop)


I used a small On the Edge scallop blank for this.  Again I think it is fairly self explanatory- the chandelier die cut has been inked round the edges and has self-adhesive crystals in it.  I added Glossy Accents to the Candi which gives a lovely effect.

Wednesday, 26 January 2011

Retro Daisy Handbag


This is a very simple card to make.  I used a latte coloured handbag card blank from Craftwork Cards.  The first thing I did was to stick the Retro Daisies to the handbag using a glue pen.  Rather than sticking full daisies overlapping the edge and cutting off the excess, I cut the daisies in half and stuck the halves on putting the cut edge of the flower against the edge of the card.

I added card candy to the centre of the Retro Daisies, trimming off the excess that was overlapping the edge.  Then I punched some daisies from Ritzy Lime card, stuck them to the card with a glue pen and put self-adhesive crystals in the centres.

This scan doesn't do the card justice as the Ritzy Lime Card Candy and punched daisies look far nicer in real life.

Sunday, 23 January 2011

More Confetti and Crystals


This was made using a small square (9.5cm) card blank.  First of all I covered the top section of the card with the latte coloured paper and the bottom section with the marshmallow paper.  Then I cut approximately 1.5cm off the front right hand edge of the card before sticking a 3cm wide strip of ice cream coloured paper to the inside right edge of the card (this doesn't show up too well on the scan).

I punched flowers from the sheet that the In Circle Messages were on, stuck them across the join between the two papers using a glue pen and then put self-adhesive crystals in their centres.

The In Circle message is stuck to a 1 3/8" punched latte circle which in turn is stuck to an ice cream Heartfelt Flower and attached to the card with foam pads.  I attached it so that it overlapped the edge of the card blank to make it a little different.

Sunday, 16 January 2011

Glitz and Glamour and Crystals


The lime card blank is from Craftwork Cards (of course) and I cut an 11cm square of Glitz and Glamour paper with chandeliers on which I then stuck to the card blank with double sided tape.  I stuck one large two small black Spiky Flowers to the top left of the card with foam pads and added cream Card Candy to the centres.

The In Circle message is attached to a punched scallop circle with double sided tape and the scallop circle is attached to the card with foam pads.  To finish off I added self adhesive crystals to the chandeliers.

Thursday, 26 August 2010

Golden Wedding


I was asked to make this card for a Golden Wedding Anniversary.
The chipboard heart was embossed using the Cuttlebug D'Vine Swirls embossing folder and then I painted it with a gold Dabber. I added three gold crystals down the left hand side and finished the card off with gold sheer ribbon and an Elegance Save the Date message.