Tuesday 31 May 2011
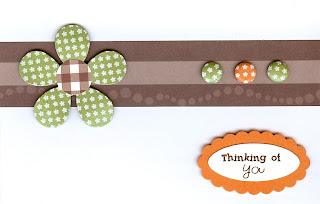
Fruit Scoop - Thinking of You
A simple card using a strip of Fruit Scoop and an embossed Retro Daisy which matches the Candi that I used.
Labels:
Candi,
Colour Me Ovals,
Fruit Scoop,
Retro Daisy
Fruit Scoop
Monday 30 May 2011
Embossed Daisy Frame
This is something a little different - I embossed a large square scallop panel using the distressed stripes Cuttlebug Embossing Folder and used this as the background. Then I gently rubbed a black Stazon pad over the top of an embossed daisy frame before cutting it in half diagonally and attaching it to the square panel. Finally I finished the card off with three red Retro daisies with Candi centres.
It perhaps doesn't show too well on the image but I used 2mm foam pads to attach the outside two daisies and 1mm pads for the centre daisy.
Sunday 29 May 2011
Fruit Scoop - Stitched Just for You
I used a DL Back to Basics blank from Craftwork Cards along with Fruit Scoop die cuts. The stitching is done using Doodlebug Designs Sew Easy rub ons. I've had these a long time - nit sure if they are still available.
Saturday 28 May 2011
Fruit Scoop - Good Luck
This was inspired by Kath Stewart whose fabulous Fruit Scoop cards were shown on the Craftwork Cards blog earlier this week http://craftworkcards.blogspot.com/2011/05/kath-works-her-magic.html
It's pretty self-explanatory. The bunting, flowers, elephant and message are attached with foam pads to give dimension and I used some Doodlebug Design rub ons for the letters on the bunting.
I have actually made this for a very good friend so let's hope it does the trick!
Friday 27 May 2011
Yummy Scrummy Daisies
Milk and Dark Chocolate Yummy Scrummy papers and daisies on a cream square Back to Basics blank from Craftwork Cards.
Thursday 26 May 2011
Wednesday 25 May 2011
Fruit Scoop - Doodling
I don't usually do this as I like elements on my cards to be even and match but I have drawn faux stitches round the edge of this card!
Tuesday 24 May 2011
Just for You
This was made from two On the Edge Elegant blanks - with the smaller purple one being used as a wrap round the larger white one. I scored the front of the larger one and folded it back over a layer of dotted paper - this shows off the lovely edge of the card. The notch tag was embossed using a Cuttlebug folder and I chose the diamond pattern paper to tie in with it.
Labels:
Candi,
Fruit Scoop,
Notch Tag,
On the Edge Elegant blank
Monday 23 May 2011
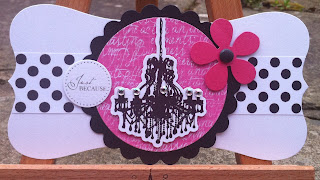
Très Chic - Just Because
I used Elegant Rectangles as the base for this card. The chandelier has five self-adhesive crystals on it which add a little sparkle.
Sunday 22 May 2011
Très Chic - Scalloped Circles
This uses the same principle as yesterday's card with the two scalloped circles. I have positioned the flowers and the Tour Eiffel die cut overhanging the edges of the circle which makes the card a little different.
Labels:
Candi,
Grosgrain Ribbon,
Notched Flowers,
Tour Eiffel Die Cut,
Très Chic
Saturday 21 May 2011
Warren
I used two large scalloped circles as the base for this card - scored across the top of the back one and stuck the two together using strong double side tape.
Friday 20 May 2011
On the Edge - Elegant
Something a little different this time in that I folded back the edge of the card - I actually pinched this idea from Julie Hickey but I am sure she won't mind!
Labels:
Candi,
Fruit Scoop,
Notched Flowers,
On the Edge Elegant blank
Thursday 19 May 2011
Wednesday 18 May 2011
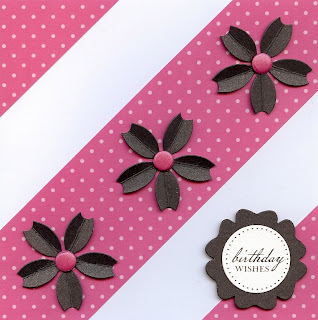
Très Chic - Birthday Wishes
I used 148mm square Back to Basics blank for this. The circle was cut using a Nestabilities Die. I still really like the Très Chic papers and the black and hot pink colour combination.
Tuesday 17 May 2011
Fruit Scoop - Happy Birthday
This is a Craftwork Cards DL Back to Basics blank. I usually use these as portrait but opted for landscape this time. The colours in Fruit Scoop are lovely and vibrant, and there are so many combinations which work well together. I love the combination of lime and turquoise.
Labels:
Candi,
Fruit Scoop,
Heartfelt Flower,
In Circle Message,
Notched Flowers
Monday 16 May 2011
Fruit Scoop - Birthday Wishes
I cut three Retro Daisies in half and added half a punched circle to each before attaching them to the turquoise Fruit Scoop panel using a glue pen. I then added a Heartfelt Flower with a Tiny Sentiment and Candi on it.
Labels:
Candi,
Fruit Scoop,
Heartfelt Flower,
Tiny Sentiment
Sunday 15 May 2011
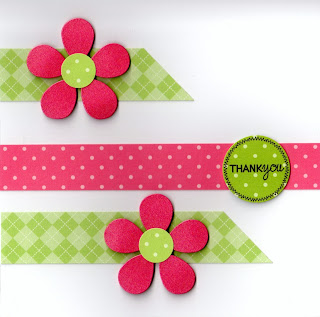
Fruit Scoop - Thank You
Another DL Back to Basics blank. These papers were the pieces left from the card with buttons on that I posted a couple of days ago. The ribbon is actually two pieces - my original plan to cut a slot in the spine of the card, thread the ribbon through and have it going round the front wouldn't work due to the angle.
Labels:
Candi,
Fruit Scoop,
Grosgrain Ribbon,
Heartfelt Flower,
Notched Flowers
Saturday 14 May 2011
Fruit Scoop - Windmill Flower
This card was made with a DL scalloped edge Back to Basics blank from Craftwork Cards. The windmill flower is one of the flowers featured in Julie Hickey's Make Your Own Flowers Die Cut Pad which is available from QVC http://www.qvcuk.com/ukqic/qvcapp.aspx/view.2/app.detail/params.item.590794/walk.yah.UKCO~U664
Friday 13 May 2011
Fruit Scoop - Buttons
This card was made using a DL Back to Basics blank from Craftwork Cards. I used Glossy Accents to stick the buttons on and now know you need to be careful not to use too much or it comes out round the edges! The large paper rose was made using the lid of a Pringles tube for a template and for the smaller roses I drew round a votive holder!
Labels:
Buttons,
Fruit Scoop,
In Circle Message,
Paper Rose
Thursday 12 May 2011
Fruit Scoop - Thank You
Another quick and easy card using Fruit Scoop and a 148mm square Back to Basics card blank. The daisies are attached with 2mm foam pads to extra dimension and, although it doesn't show too well, I curled the petals on them.
Wednesday 11 May 2011
Fruit Scoop - Fab Friend
Another simple card using Fruit Scoop from Craftwork Cards. I added three panels of Fruit Scoop paper across the bottom of a 148mm square Back to Basics card blank then attached the die cuts and Candi using foam pads.
Tuesday 10 May 2011
Monday 9 May 2011
Fruit Scoop - Easel Card
This easel card was made using a Back to Basics 148mm square card. I have used some of the new Fruit Scoop die cuts from Craftwork Cards - they are lovely and the colours are superb.
Sunday 8 May 2011
Fruit Scoop - Roses
I love these paper roses and the more of them I make, the easier they seeem to be. I used a DL Back to Basics blank for this card and attached three panels of turquoise Fruit Scoop paper. I then added 3 roses all made from Fruit Scoop paper and attached a Fruit Scoop Tiny Sentiment to the centre rose.
Saturday 7 May 2011
A Small Fruit Scoop
You can't get much simpler than this. I used an Elegant Rectangle as the base and added a panel of Fruit Scoop paper with a paper rose on it. Finally I attached a Fruit Scoop Tiny Sentiment to a punched scalloped oval and used foam pads to stick them to the card.
Friday 6 May 2011
Fruit Scoop - Take 2
This card was made using the panels left over from Wednesday's card. I used Notched Flowers this time though instead of Retro Daisies.
Labels:
Candi,
Fruit Scoop,
Heartfelt Flower,
In Circle Message,
Notched Flowers
Thursday 5 May 2011
Paper Roses
This card was made using an 8" by 8" Ice White pearlescent blank so is lovely and sparkly. It was actually a commission for a birthday - I hope the lady concerned liked it!
The chipboard numbers were embossed using a Cuttlebug Embossing Folder and then I painted them with a silver Tim Holtz Dabber.
The paper I used for the roses is from Craftwork Cards - it is quite old though and I can't remember the name of it, but I thought it went well with the rest of the card.
Wednesday 4 May 2011
Fruit Scoop - Retro Daisies
To make this card I cut a square of Fruit Scoop paper which was the same size as the card blank and then trimmed it down. This design of paper made it relatively easy as the spots helped me to keep it even. The good thing is that I can use the three remaining panels on another card - watch this space!
Although it perhaps doesn't show too well, the daisies and the scalloped circle are chocolate brown but this would work equally well with black.
Labels:
Candi,
Fruit Scoop,
In Circle Message,
Retro Daisy
Tuesday 3 May 2011
Fruit Scoop - Quick and Easy
This card was really easy to make and I think this design is suitable for a man. I just cut three panels from Fruit Scoop papers, attached them to a cream 148mm square Back to Basics blank, attached a fourth panel across them horizontally and added an In Circle Message on a punched scallop circle.
Monday 2 May 2011
Très Chic - Paper Rose
Another card made using Très Chic. The Tour Eiffel and Paris die cuts are attached with foam pads. I also added a paper rose made from Très Chic papers - these are fairly simple to make and look really effective.
Sunday 1 May 2011
Très Chic and Fruit Scoop
I used a combination of Fruit Scoop and Très Chic papers on this card. The black scalloped circle, Tour Eiffel die cut, Retro Daisy and the Heartfelt Flower are all attached with foam pads to give dimension.
Subscribe to:
Posts (Atom)


